
- As an Amazon Associate, I earn from qualifying purchases.
Car window tints can enhance privacy, keep your car cooler, and block harmful UV rays. But what happens when that tint starts to fade, bubble, or peel? Maybe you’ve had a change of heart about the look or discovered your tint isn’t compliant with local laws. Whatever the reason, removing old or damaged tint is essential to restoring the aesthetics and functionality of your car windows.
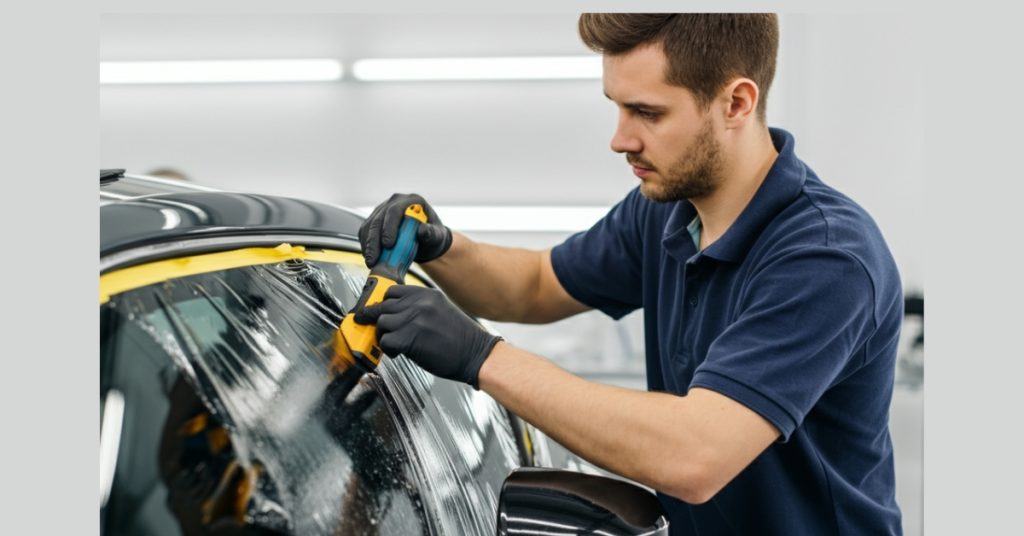
Removing window tint may seem daunting, but with the right tools and techniques, it’s a task you can handle from the comfort of your home. This guide breaks down why removing old tint is important, how to do it step by step, and what precautions to take to ensure a safe, damage-free process.
Contents
Why It’s Important to Remove Old or Damaged Window Tint
Old or damaged tint isn’t just an eyesore; it can also pose various functional and safety concerns. Here’s why you should consider removing deteriorated or outdated window tint:
1. Reduced Visibility and Distraction
As window tint gets older, it often begins to bubble, peel, or discolor, which can significantly reduce your ability to see clearly through the glass. This not only affects your visibility, especially at night or during bad weather, but also creates distractions inside the car. Even small bubbles or peeling edges can catch your eye while driving and shift your focus away from the road. Over time, these problems can make your car unsafe to operate and increase the risk of accidents.
2. Aesthetic Appeal
Window tint that has faded, bubbled, or developed a purple hue over time can make even a well-maintained car look neglected. Damaged tint takes away from the sleek and polished look that tinted windows are meant to provide. By removing the old, worn-out film, you instantly refresh your car’s appearance and restore a cleaner, more professional finish to the glass. This simple upgrade can improve not only your vehicle’s style, but also its curb appeal. If you’re considering new tint after removal, you might want to check how much does it cost to tint car windows.
3. Compliance with Tint Laws
Different states and countries enforce specific window tint laws, often based on how much light must be allowed through (Visible Light Transmission or VLT). If your current tint no longer meets those standards—either because it was too dark when applied or has changed with age—you may face fines or be asked to remove it. Staying compliant ensures you avoid legal trouble and keeps your vehicle safe for road inspections. Removing non-compliant tint is a proactive way to prevent penalties and drive with peace of mind.
4. Better Adhesion for New Tint
If you’re planning to install new tint on your vehicle, leaving the old film and adhesive behind can cause serious problems. Residue from the previous layer prevents the new tint from bonding properly, leading to bubbles, peeling, or uneven application. Removing the old tint first ensures your windows are completely clean and smooth, providing the perfect surface for the fresh film. This results in a more professional finish and extends the lifespan of your new tint.
How to Remove Tint from Car Windows (Step-by-Step Guide)

With some patience and the right tools, removing tint doesn’t require professional help. Follow these simple steps to tackle this task:
Step 1: Gather Your Supplies
Before you begin, collect all the necessary tools to make the job smooth and safe. You’ll need a razor blade or plastic scraper, a heat gun or hairdryer, and a spray bottle with soapy water or ammonia solution. Keep microfiber cloths handy for cleanup, and use a garbage bag or plastic sheet if following specific methods. If using ammonia, always wear gloves and a mask to protect yourself.
Step 2: Heat the Tint
Turn on your heat gun or hairdryer to the highest setting and direct it toward one corner of the tint. The heat softens the adhesive beneath the film, making it easier to lift and peel. Hold the heat source close but not too long in one spot to avoid damaging the glass. Continue heating as you work across the window for best results.
Step 3: Peel the Tint
After heating, use your fingernail or scraper to lift the edge of the tint. Slowly pull the film back in a steady motion, trying to keep it in one piece. If the tint starts tearing or sticking, reapply heat to loosen the adhesive further. Taking your time ensures a cleaner peel and less leftover residue.
Step 4: Deal with the Adhesive Residue
When the tint film is fully removed, you’ll often find sticky glue left behind. Spray the area generously with soapy water or an ammonia solution to soften the residue. Let it sit for a few minutes to break down the adhesive. This makes the scraping process much easier and prevents streaks on the glass.
Step 5: Scrape Off Residue
Use a razor blade or plastic scraper to gently remove the softened adhesive. Keep the blade at a shallow angle to avoid scratching the glass. Work slowly and reapply the solution if needed for stubborn spots. Patience here helps achieve a perfectly smooth finish. For tips on dealing with other sticky residues, check our guide on how to remove stickers from your car.
Step 6: Clean the Glass
Once all adhesive is removed, finish by wiping the windows with a quality glass cleaner. Use a microfiber cloth to polish the surface and eliminate streaks or smudges. This final cleaning step ensures your windows are crystal clear. With the tint gone, your car looks cleaner and well-maintained.
Best Methods for Removing Tint from Car Windows

Still unsure about the best approach? Here’s a detailed overview of four popular methods for removing tint from car windows:
1. Heat Method
The heat method is one of the most commonly used ways to remove window tint. By using a hairdryer or heat gun, you gently warm up one corner of the tint until the adhesive underneath softens. Once it loosens, you can start peeling the tint away in large sections, which helps reduce tearing. After removing the film, any leftover glue can be cleaned with soapy water and a cloth, leaving the glass clear and smooth.
2. Steam Method
A steam cleaner can make tint removal faster and cleaner, especially for larger windows. The steam penetrates through the tint film and breaks down the adhesive that bonds it to the glass. As the adhesive softens, the tint peels away with minimal effort, often coming off in full sheets. This method also reduces the risk of leaving sticky residue behind, which makes cleanup much easier.
3. Ammonia & Plastic Bag Method
For stubborn tint, the ammonia and plastic bag method is highly effective. You simply spray the window tint with a generous amount of ammonia, then press a black garbage bag firmly against the glass. Leaving the car in direct sunlight for 30–40 minutes allows the heat and chemicals to work together, softening the adhesive. Once ready, you can peel off the tint with far less resistance, followed by a quick wipe-down to remove any residue.
4. Soap & Razor Blade Method
If you’re dealing with tint that won’t peel off easily, the soap and razor blade method may be the solution. First, spray the window thoroughly with soapy water to act as a lubricant. Then, carefully scrape the tint using a razor blade at a shallow angle to avoid scratching the glass. While this method requires patience and precision, it’s very effective at removing both the tint film and any stubborn adhesive left behind.
How to Avoid Damage While Removing Tint

Removing tint doesn’t have to result in scratched or damaged windows. Follow these tips to protect your car during the process:
Avoid Aggressive Scraping
Use gentle strokes when scraping adhesive to prevent scratches.
Be Careful Around Defroster Lines
Rear windows are delicate due to defroster lines. Use extra caution when removing tint to avoid damaging these components.
Steer Clear of Harsh Chemicals
Avoid using strong chemicals like acetone or bleach, which can damage your car’s interior and glass.
Take Your Time
Rushing the process increases the risk of mistakes. Patience is key to achieving the best results.
Frequently Asked Questions
Can I remove car window tint myself?
Yes, you can remove tint on your own with basic tools like a heat gun, steamer, or razor blade. It takes patience and care to avoid leaving residue behind. Following the right method ensures a clean and safe removal.
How long does it take to remove tint from a car?
On average, it takes between 1–3 hours to remove tint completely. The exact time depends on how many windows you’re working on and how old or damaged the tint is. Older tint usually takes longer to peel and clean.
What’s the best way to remove tint glue?
Heat and ammonia-based solutions are the most effective for loosening adhesive. After softening, you can wipe away the glue with soapy water or a cloth. For stubborn spots, a razor blade works well if used gently.
Will removing tint damage my windows?
No, tint removal does not damage glass if done properly. Avoid scraping too hard or using sharp angles with the razor. Working slowly and using heat or steam will protect the window surface.
Is it cheaper to remove tint at home or professionally?
DIY removal is the cheapest option since you only need simple household tools. Professional services cost more but save you time and hassle. Choose based on your budget and confidence in doing the job.
- As an Amazon Associate, I earn from qualifying purchases.

